
Once you've set up your approval settings, learn how to manage your incoming booking requests! 😊
Approval settings can be managed here:
How do I manage my Approvals?
Once you’ve enabled Approvals for your venue a new tab will appear under the ‘Main’ menu on the left hand side of your dashboard:

Clicking into the Approvals area will allow you to manage all of your pending bookings in one location. From here you are able to view, accept and reject your pending bookings, and see the status and history of all prior bookings.
You’ll also be notified of a new pending booking via email. Clicking the link in the corresponding email will take you directly to the ‘Approvals’ section of your dashboard.
Please note: You can also manage your pending bookings from the ‘Calendar’. All pending bookings will appear in the calendar in orange prior to approval.
You will be able to see the following information for each pending booking:
-
Booking Reference
-
Approval Status
-
Space and Facility
-
Booking Date
-
Customer Name
-
Price
-
Approval Expiry Time
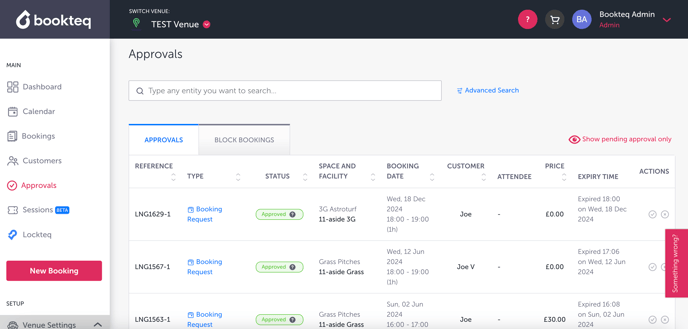
To approve or reject a booking, simply click on the tick ✅ or cross ❌ icon beneath the ‘Actions’ column.
Once you’ve accepted a booking, the payment will be taken from the customer and a confirmation email sent.
What happens when I reject a booking?
If, for any reason, you need to reject a pending booking, simply click the cross icon in the “Actions” column.

This will bring up a new window where you’ll be asked to confirm the cancellation and provide the reason for doing so. You’ll also be asked if you’d like to permanently block out this facility at this particular time and date to prevent any future bookings.
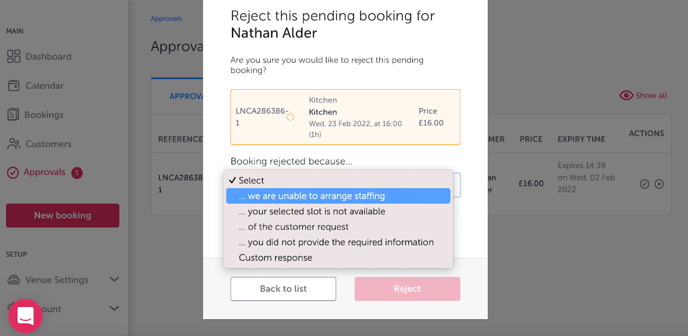
Click on ‘Reject’ to cancel the booking. The customer will then be notified of the cancellation via email and no payment will be taken.